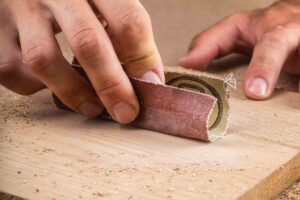
The art of sanding for professional-level woodworking results.
Sanding is a crucial step in woodworking that ensures a smooth, clean surface ready for painting, staining, or finishing. Done correctly, it enhances both the appearance and durability of your wood projects
Let’s break down 5 key sanding techniques for a pro-level finish.
1. Start with the Right Grit
Begin sanding with the appropriate grit level.
Choosing the right sandpaper grit is the foundation of effective sanding. Start with a coarse grit (such as 60–80) to remove imperfections or old finishes. Then gradually work your way up to finer grits (120–220) to smooth the surface and prepare it for finishing. Skipping grit levels can leave scratches that will be visible after staining or sealing.
2. Sand Along the Grain
Always follow the direction of the wood grain.
Sanding against the grain can leave noticeable scratches that become more visible after finishing. Always sand in the direction of the grain to maintain a uniform surface texture and avoid damaging the wood fibers. This is especially important for softwoods and visible surfaces.
3. Keep the Pressure Even
Apply consistent pressure while sanding.
Too much pressure can cause uneven surfaces, while too little pressure might not remove material effectively. Maintain a steady, moderate pressure throughout the process. Also, move your hands frequently to avoid over-sanding in one spot, which can lead to uneven areas.
4. Use a Sanding Block or Power Sander
Use tools for better consistency and efficiency.
Hand-sanding alone can result in uneven pressure and fatigue. Using a sanding block provides a flat, even surface that distributes pressure evenly. For larger projects, consider using a power sander—like an orbital or belt sander—to save time and effort while achieving professional results.
5. Clean Between Grits
Wipe off dust before switching sandpaper grits.
Dust from sanding can clog sandpaper and scratch the surface when using finer grits. Always wipe down the wood with a dry cloth, tack cloth, or damp rag between each grit stage. A clean surface allows the finer grits to do their job effectively and leaves a flawless finish.
Sanding may seem simple, but mastering a few key techniques can dramatically improve the quality of your work. From choosing the right grit to controlling your pressure and direction, attention to detail makes all the difference. With practice and patience, you’ll be able to produce smooth, beautiful wooden surfaces that are ready for any finish.


